Friday, January 15, 2021

newspaper pots for sowing winter garden

Made quite a few pots. Pretty fast once you get going.


Here's my notes and pictures. Makes about a 3" pot from 1/2 sheet of newspaper about 22"x11".


Start out with a piece of newspaper about twice as tall as it is wide. (2h=w)


Fold in half bottom to top.


Then make crease down center and open.


Turn over and fold on other side.


Fold and tuck into pocket.


Next make creases for bottom of pot by folding tip (which turns into middle bottom) in both directions.


One more bottom of pot crease.


Open into pot shape.


It will be interesting to see how well these work.

Saturday, May 16, 2020

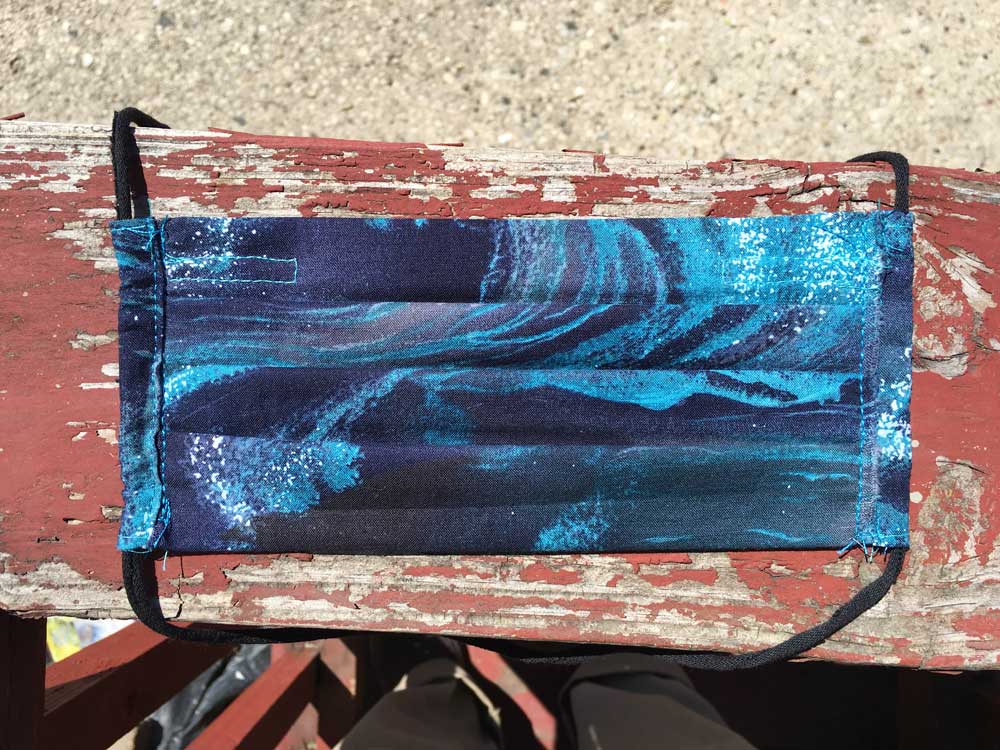
Face Masks

I made The first set of shaped face masks with place to put insert & wire  by was following the patterns on this site.  https://www.craftpassion.com/face-mask-sewing-pattern/ . 

I also learned how to make t-shirt string/yarn https://www.craftpassion.com/recycle-tutorial-making-of-t-shirt-yarn/ .When I was making these masks there were a lot of shortages. I used an old tired sewing machine so my stitches aren't perfect. Broke 3 needles (luckily I had spares) until I figured out how to sew small seams through multiple layers of fabric.


Ready to go to work in Denver and not get the $1000 fine.

When it appeared that my sister in Colorado would need more face masks, I made these pleated, one size fits most, masks from Instructables that also had a place to put insert & wire.  https://www.instructables.com/id/DIY-Face-Mask-With-Filter-Pocket/ . I like putting t-shirt string in so the loop is behind the neck. I like this pattern because you just cut one piece and 2 edge pieces. However it's more of a general mask and is not fitted.


Then I noticed on my youtube feed a video from fabric patch https://www.youtube.com/watch?v=pbqkLcPHhcQ

Here is a sheet explaining material used to makes masks for nurses so they wouldn't need to keep reusing the same N95 mask multiples times https://media.rainpos.com/220/fp95s.pdf

Here's a link to their website where you can get a fitted pattern for your face and watch more videos.

I haven't gotten around to making any masks from this site yet. However I am intrigued that the mask is lower under the eyes which may provide a better fit and prevent steaming up glasses.

The tie from coffee bag will probably be more comfortable than floral wire. Pipe cleaners aren't strong enough to keep the mask shaped around my beaky nose and minimize steaming up my glasses. I'd like to try cutting up a thin disposable metal pan, folding it, then taping sharp edges.

I think I would prefer to have a removable nose wire piece. I don't think that I will ever use a filter pocket. 2 layers of cloth is enough.

Saturday, February 16, 2019

4 strand slippers

Quick made up slippers for us since our old ones have holes in them and our feet were cold.
These work up pretty quickly using 4 strands.

Men's size 11


Ran out of brown so only did 3 strands around the ankle. Did not rib the ankle. Just kept going around. A lot quicker. Plus easier to tell our slippers apart besides size.

Women's size 8-9


Really swamped. Haven't finished cousin's plarn rug yet. Just had to put these up so can use pattern another year.

Wednesday, September 7, 2016

Plarn Rug

My largest hook which I think is a S. The hook is not labeled so I'm not sure.
A lot of plastic bags. Each color change is a plastic bag.
I cut 2" loops.
A spiral of mostly single crochet and 3 stitch increase at corners except towards end where I changed to 2 stitch increases because the rug was starting to ripple.
Picture was taken at an angle so it's actually more square than the picture shows.


I'll be real curious to see how well it wears. I wanted a crocheted rug because the dirt falls through and is easily swept up while the plastic should hopefully stay cleaner than cloth.

Friday, September 2, 2016

Quick Crocheted slippers 4/9/16

Made these a while ago using a big hook and 4 strands of yarn I think. The slippers are nice and cushy but use up a lot of yarn fast.


Friday, July 1, 2016

Curtain Patterns

Windows up north needed cafe curtains for privacy so I sewed up some curtains but not valences. We'll see if they need that once we hang the curtains. Used 2 king sheets, have some left over for valences if I want them. Large picture window has shelf right on top of it so probably no space for valence anyway.

Here's the patterns.


Rods are l/8" and 5/8". Curtains are pretty light so should be fine. I made a 2" rod pocket with a 2" ruffle on top.

I measured to extend below window by adding 4 extra inches. Ended up using sewed edge of sheets for bottom of all curtains to minimize sewing time.


Measure and cut trying to take advantage of already sewn seams and hems.

Iron and sew up side seams
  • Mark 1 inch, fold over to mark and iron, then fold over again and iron, then sew
Rod pocket & ruffle
  • Mark 1" and 5" from raw edge
  • Iron a 1 inch hem folded over like side seam
  • Then fold over and iron on 5" mark
  • Mark 2" from fold for ruffle
  • Sew over 1" hem
  • Sew along 2" mark to create ruffle

Materials:
sheets
sewing machine and thread
rotary cutter, plastic T-square, and cutting pad
ruler, pencil or marking pen,
pins
ripper if you sew rod pocket and ruffle before side seams

Note: Sew up side seams before making rod pockets and ruffles.

Note: Even though I haven't been posting I have been creating. Sometimes it's hard to get to the computer. Crocheted slippers and knitted a scarf. When I find the pictures, I'll post them.


Sunday, July 12, 2015

Kids summer hats

Made these hats for the kids while they were riding in the car with us and during quiet times while we were up north. Wrote down the pattern, sort of, when I was making them but lost it.

Crown
  • I measured their heads. They were about 19 inches in circumference.
  • I started with a magic ring and 6 SC, then worked in a round spiral until it reached about 18" in circumference. 
  • Basic increasing: R1 6 sc, R2 12 sc, etc. more or less. I had interruptions so lost count. I just basically made sure that the circle stayed flat.
Sides: just crocheted SC without increasing for about 8-10 rows

Brim: Increased SC as needed to keep flattish. The girl's hats curled up but looked really cute. To curl down probably would have had to work from inside so the other side of SC was out.

Notes: Used 4 play yarn I had laying around. Probably could get 2 hats out of one skein. Worked in spiral so didn't really have to keep track of beginning and ending of rows. Wished I had some stiff string to try or pliable straw.

Thursday, February 19, 2015

Simple Crocheted Slippers, Modified

I made these for my cousin while we were driving in the car because she liked the ones I made for my husband and me. I quick took a picture of them before giving them to her.


First step was to draw a picture of her foot and download the pattern from www.crochetand knitting.com/slpprs5.htm

I used a "g" hook. Then I modified it slightly (see my notes below)
  1. I crocheted 2 strands for the sole and made slightly fewer rows. I also ribbed by crocheting in the back stitch. Using 2 strands and ribbing makes a very cushy slipper. The sole was slightly wider and longer than her foot.
  2. Body of slipper was decreased basically the same except with slightly different number of stitches and crocheted in back loops because it is easier to count my rows.
  3. Crocheted 16 slip stitches to make a rib 15 SC high. I usually connect as I go.
I crochet in steps to keep both feet the same size. First I do both soles, then the bodies, then the ribbing so I can adjust if needed as I go. I generally store the pattern in the same zip lock bag where I keep my project until I'm done.


I've been crocheting but not sure when I will be able to post again.